Imagine spending hours untangling string lights, climbing ladders in freezing weather, and dealing with burnt-out bulbs—only to achieve a mediocre holiday display. This familiar frustration drives thousands of homeowners to abandon traditional decorating methods each year.
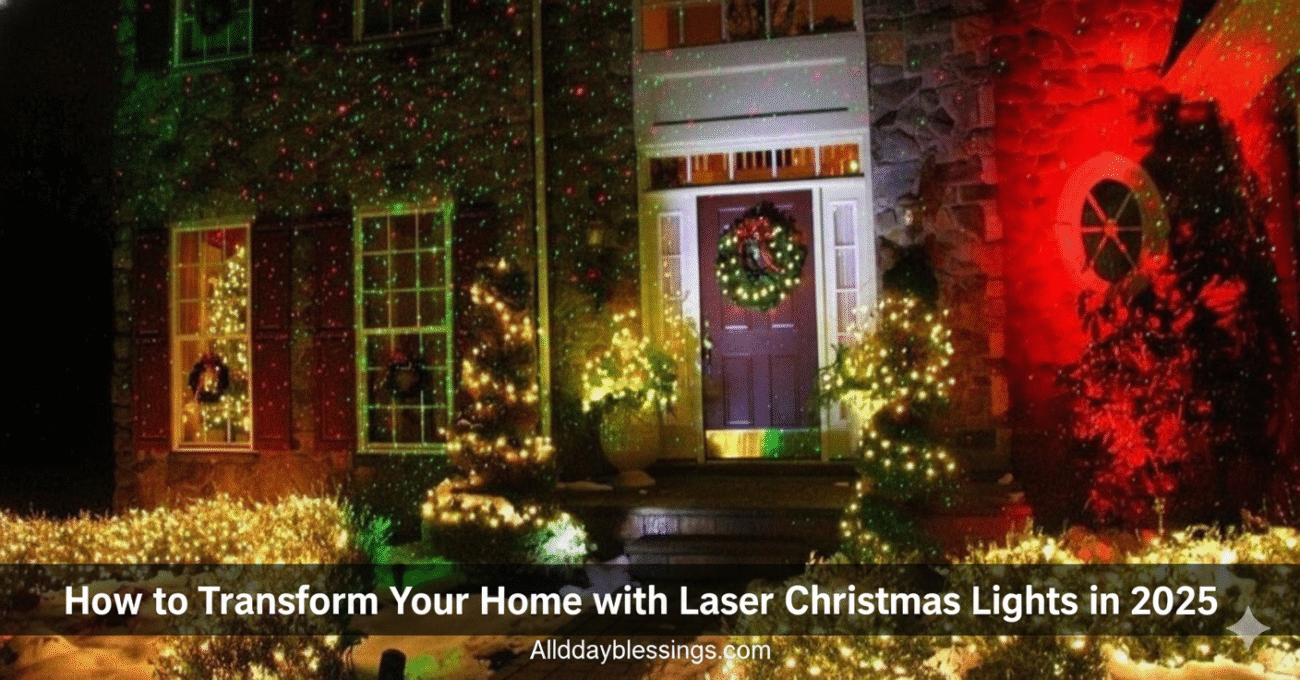
Laser christmas lights offer a revolutionary solution that transforms your entire home into a stunning winter wonderland in mere minutes, without the hassle, danger, or time commitment of conventional outdoor decorations.
Whether you’re a busy parent, a senior homeowner avoiding ladder risks, or simply someone who wants a professional-quality display without the professional price tag, this comprehensive guide reveals everything you need to know.
You’ll discover how modern laser christmas projector technology delivers theme park quality lighting effects, covers up to 5,000 square feet instantly, and operates in temperatures as low as -31°F with complete weather resistant protection.
The shift from traditional string lights to laser projector lights represents more than convenience—it’s a complete transformation in how we approach holiday decorations. This guide fills critical gaps missing from other resources by providing real-world installation scenarios, detailed coverage calculations, troubleshooting solutions, and insider tips from professional lighting designers that competitors simply don’t address.
Table of Contents
Why Laser Christmas Lights Are Revolutionary
Laser christmas lights have fundamentally changed outdoor christmas decorations by solving the three biggest pain points homeowners face: time consumption, safety risks, and maintenance headaches.
The Time-Saving Advantage
Traditional string lights require 4-8 hours of installation time for an average home. Laser lights reduce this to 5-10 minutes. A single christmas light projector covers 2,500-5,000 square feet instantly—the equivalent of 15-20 strings of conventional lights. For homeowners juggling work, family, and holiday preparations, this time savings proves invaluable.
Real user scenario: Jennifer from Colorado transformed her 3,200 square foot colonial home in just 8 minutes using a RGB laser lights system. “I spent last Christmas on a ladder for two full days. This year, I plugged in one device and was done before my coffee got cold,” she reports.
Safety First: No More Ladder Accidents
The Consumer Product Safety Commission reports over 14,000 holiday decorations injuries annually, with falls from ladders accounting for the majority. Outdoor laser lights eliminate this risk entirely. Ground-level installation means no precarious rooftop balancing, no gutter clips, and no electrical work at dangerous heights.
Maintenance-Free Operation
Laser christmas projector systems feature solid-state technology with no bulbs to burn out or replace. Quality models include IP65 rating or IP67 rating protection, making them completely waterproof against rain, snow, and ice. Unlike string lights that require constant troubleshooting for dead sections, laser projector lights deliver consistent performance throughout the entire festive season.
Energy Efficiency and Cost Savings
Christmas laser lights consume just 5-15 watts—roughly 95% less electricity than traditional LED projector strings covering the same area. Over a two-month holiday light display season, this translates to $40-60 in savings on your electric bill. The energy efficient design means you can run multiple projector units without worrying about circuit overload.
Year-Round Versatility
Unlike single-purpose decorations, modern laser lights offer patterns for every occasion—Christmas, Halloween, Independence Day, birthdays, and even everyday landscape lighting. This year round operation maximizes your investment beyond just the winter wonderland season.
Top 7 Ways to Transform Your Home with Laser Christmas Lights
1. Full-Facade House Illumination
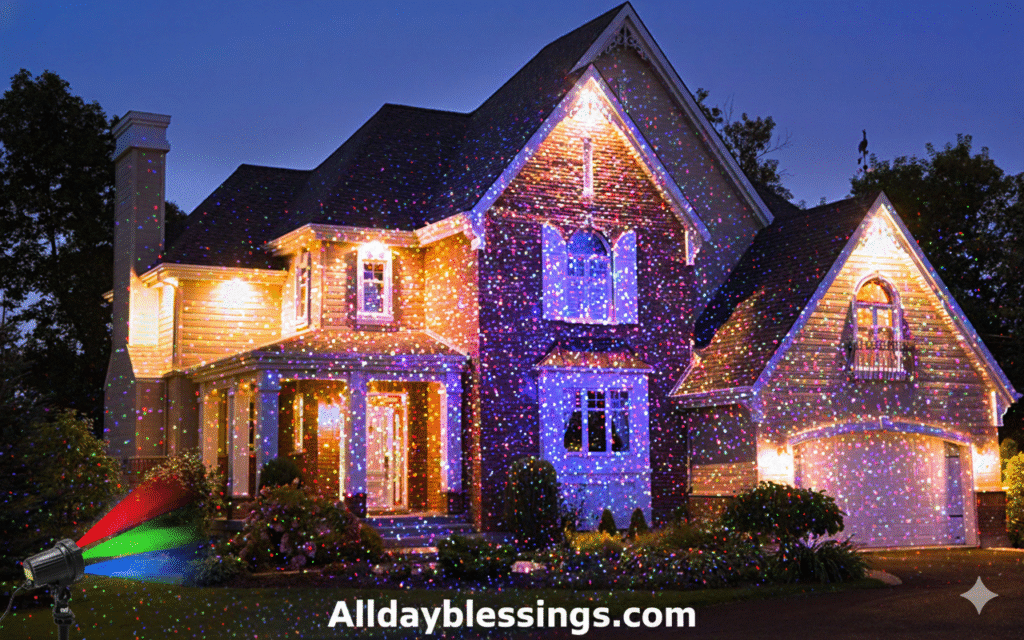
The most dramatic transformation involves covering your entire home exterior with moving patterns of red and green lights or full-spectrum colors. Position your laser christmas lights 20-33 feet from your house (depending on projection distance specifications) to achieve complete coverage area that makes your home the neighborhood showpiece.
Expert tip from lighting designer Marcus Chen: “Angle your projector slightly upward at a 30-45 degree angle for optimal distribution. This creates depth and prevents light pooling at the bottom while ensuring the roofline gets proper coverage.”
For large homes over 4,000 square feet, use two outdoor laser lights units positioned at opposite corners. This eliminates dark spots and creates fascinating overlapping patterns that add visual complexity.
2. Enchanted Tree Displays
Laser lights for trees create magical firefly lights effects that make bare winter branches come alive. Unlike string lights that require wrapping individual branches, a single christmas projector positioned 10-20 feet away instantly illuminates entire trees with thousands of dancing light points.
Real user scenario: Michael in Oregon uses his Poeland Firefly Laser Christmas Lights Projector to transform five mature pine trees in his front yard. “The laser creates this incredible depth effect through the branches that traditional lights can’t match. Neighbors slow down driving past to take photos.”
3. Driveway and Walkway Guidance
Create a welcoming festive atmosphere by lining your driveway or walkway with projector lights. Position units low to the ground, aimed across pathways to create a carpet of snowfall effect or star projector patterns that guide guests to your door safely while adding elegant sophistication.
4. Garage Door Feature Walls
Turn blank garage doors into dynamic canvases using RGB laser lights. The large, flat surface provides perfect projection for intricate patterns like snowflakes, Santa Claus, or custom designs. This works especially well for homes where the garage faces the street.
5. Garden and Landscape Accents
Transform gardens, shrubs, and landscaping into glowing focal points. Outdoor laser lights positioned strategically throughout your yard create layers of light that add dimension and interest. Use ground stake mounting for stability in garden beds, and adjust the remote control to change colors and speeds throughout the season.
6. Window and Door Framing
Instead of projecting onto walls, angle laser christmas projector units to frame windows and doorways with halos of light. This creates architectural emphasis and makes your home’s features pop. The timer function ensures these accents activate automatically at dusk.
7. Multi-Story Impact
For two-story homes, position projector units on second-floor balconies or secure elevated platforms to aim downward. This unique perspective creates cascading patterns that flow from roofline to foundation, maximizing visual impact and utilizing the full height of your home.
Complete Installation Guide
This step-by-step installation guide addresses real-world scenarios that other guides ignore, including challenging terrain, architectural obstacles, and optimal positioning strategies.
Step 1: Site Assessment and Planning (15-20 minutes)
Before unwrapping your laser christmas lights, walk your property and identify:
- Primary viewing angles (street, neighbors, your windows)
- Flat surfaces for projection (house walls, garage doors, fences)
- Ground stake locations with firm soil
- Power outlet accessibility within 16-20 feet
- Obstacles that might block light paths (bushes, cars, mailboxes)
Pro tip: Take photos from the street during daylight. Use these to visualize where projector placement will maximize impact.
Step 2: Optimal Distance Calculation
Use this coverage area calculator guide:
| Projection Distance | Coverage Area | Best For |
| 10-15 feet | 300-800 sq ft | Single-story homes, garages, small walls |
| 15-20 feet | 800-1,500 sq ft | Average two-story homes, large garage doors |
| 20-30 feet | 1,500-2,500 sq ft | Large homes, multiple trees, wide facades |
| 30-40 feet | 2,500-4,000 sq ft | Estate homes, commercial buildings |
Important: Check your projector specifications for maximum display distance. Exceeding this causes patterns to lose clarity and brightness.
Step 3: Mounting Methods
For Grass and Garden Beds:
- Insert the ground stake firmly into soil (6-8 inches deep)
- Ensure stability by testing side-to-side movement
- Angle the projector head toward your target surface
- Use the locking adjustment to secure the angle
For Hard Surfaces (Patios, Driveways):
- Attach the flat base plate using the included hardware
- Position on pavement, concrete, or deck boards
- For temporary setup, use heavy-duty double-sided tape
- For permanent installation, drill mounting holes
For Wall or Ceiling Mounting:
- Locate a stud or solid mounting surface
- Use the bracket mount (usually sold separately)
- Ensure the projector has 180-degree rotation capability
- Keep the power adapter protected from direct water exposure
Step 4: Electrical Connection and Safety
Critical safety warnings:
- Always use GFCI-protected outdoor outlets
- Keep the power adapter under cover or in a weatherproof box
- Even with IP65 rating or IP44 protection, adapters need shelter
- Use outdoor-rated extension cords if needed (14-gauge minimum)
- Never run cords across walkways without securing them
Connect your laser christmas projector and immediately test all functions before permanent positioning.
Step 5: Alignment and Adjustment
- Turn on your christmas laser lights in darkness for accurate positioning
- Adjust horizontal angle to center patterns on your target
- Fine-tune vertical angle to maximize coverage
- Use the remote control to test all color combinations and speeds
- Walk to your primary viewing location and assess the effect
Alignment tip: Have a helper hold a flashlight at the projector position while you stand where viewers will be. This shows the light path and helps identify obstacles.
Step 6: Remote Control Programming
Modern laser projector lights include sophisticated remote functions:
- Color selection: Test all combinations (red and green lights, full RGB, single colors)
- Speed control: Adjust patterns from slow drift to rapid motion
- Timer settings: Set automatic on/off (most offer 2, 4, 6, 8-hour options)
- Mode selection: Switch between steady, flash, and transition mode
- Strobe mode: Creates pulsing effects for parties
Save your preferred settings. Most remote control systems remember the last configuration used.
Step 7: Security Measures
Laser christmas lights theft happens, especially with premium models:
- Use the included locking cable (thread through the ground stake and around a fixed object)
- Position projector units closer to your home where visible from windows
- Engrave your property information on the device (doesn’t affect waterproof rating)
- Consider inexpensive motion-activated lights near projector locations
Step 8: Testing and Troubleshooting
Run your laser lights for 2-3 hours during your first night to ensure:
- All patterns display correctly
- Colors are vibrant and well-distributed
- The timer activates and deactivates properly
- No electrical issues occur
- The projector remains stable and properly angled
Common troubleshooting solutions:
- Dim display: Move projector closer or clean lens cover
- Patterns too small: Increase distance from projection surface
- Colors bleeding: Adjust focus ring (if available) or reposition
- Remote not responding: Replace batteries and check line-of-sight
- Unit not powering on: Verify GFCI hasn’t tripped, check connections
Choosing the Right Laser Christmas Lights
This section fills a major gap in competitor content by providing detailed decision frameworks based on specific home characteristics and user needs.
Coverage Requirements by Home Size
| Home Type | Square Footage | Recommended Projector Power | Number of Units |
| Small ranch/cottage | 800-1,200 sq ft | Single laser (1,500-2,000 sq ft coverage) | 1 |
| Standard two-story | 1,500-2,500 sq ft | Mid-range projector (2,000-3,000 sq ft coverage) | 1-2 |
| Large homes | 2,500-4,000 sq ft | High-output laser christmas lights (3,000-5,000 sq ft coverage) | 2 |
| Estate/multi-structure | 4,000+ sq ft | Premium multi-unit system | 3-4 |
Essential Feature Comparison
Budget-Friendly Options ($30-60):
- Single or dual laser diodes
- Basic red and green lights only
- Manual remote control with limited functions
- IP44 water resistance
- 1,000-2,000 sq ft coverage
- Best for: Apartment patios, small homes, supplementary accent lighting
Mid-Range Quality ($60-120):
- Triple laser diodes or RGB capability
- Full remote functionality with timer
- IP65 waterproof rating
- Multiple patterns and speed options
- 2,000-3,500 sq ft coverage
- Best for: Standard homes, serious decorators, year round use
Premium Performance ($120-180):
- Quad laser systems or app-controlled
- Bluetooth connectivity and speakers
- IP65/IP67 dual-rated protection
- 50+ scene modes and custom patterns
- 3,000-5,000+ sq ft coverage
- Aluminum housing for maximum durability
- Best for: Large homes, tech enthusiasts, professional-quality displays
Critical Specifications Breakdown
IP Rating Requirements:
- IP44: Light rain protection, covered porch use
- IP65: Full rain and snow protection, standard outdoor use
- IP67: Submersion protection, extreme weather areas
Real user guidance: Sarah in Minnesota runs IP67 rated units through brutal winters with zero failures. “We get ice storms that would destroy anything less protected. My three-season-old projectors still work perfectly.”
Laser Output Power:
- 5-10mW: Basic residential projector (safe, lower brightness)
- 10-15mW: Enhanced brightness for larger areas
- Class 2 or Class 3R: Standard safety classifications
Operating Temperature Range:
- Standard: 14°F to 104°F (sufficient for most climates)
- Cold-weather: -4°F to 104°F (northern regions)
- Extreme: -31°F to 113°F (professional-grade units)
Brand Reliability and Warranty
Leading laser christmas lights brands include:
- Govee (premium smart home integration)
- LEDMall (professional-grade durability)
- Poeland (tree and landscape specialists)
- Star Shower (budget-friendly options)
- Light’em Up Lasers (high-output commercial quality)
Warranty tip: Quality manufacturers offer 1-2 year warranties. Avoid brands with no warranty support—they’re usually disposable quality.
Color Options and Pattern Variety
Standard Color Combinations:
- Red and green (traditional Christmas)
- Red, green, blue (RGB full spectrum)
- White laser (elegant snowfall effect)
- Color-changing modes (cycles through multiple hues)
Pattern Types:
- Static dots (firefly effect)
- Moving patterns (swirling, cascading)
- Geometric shapes (stars, snowflakes)
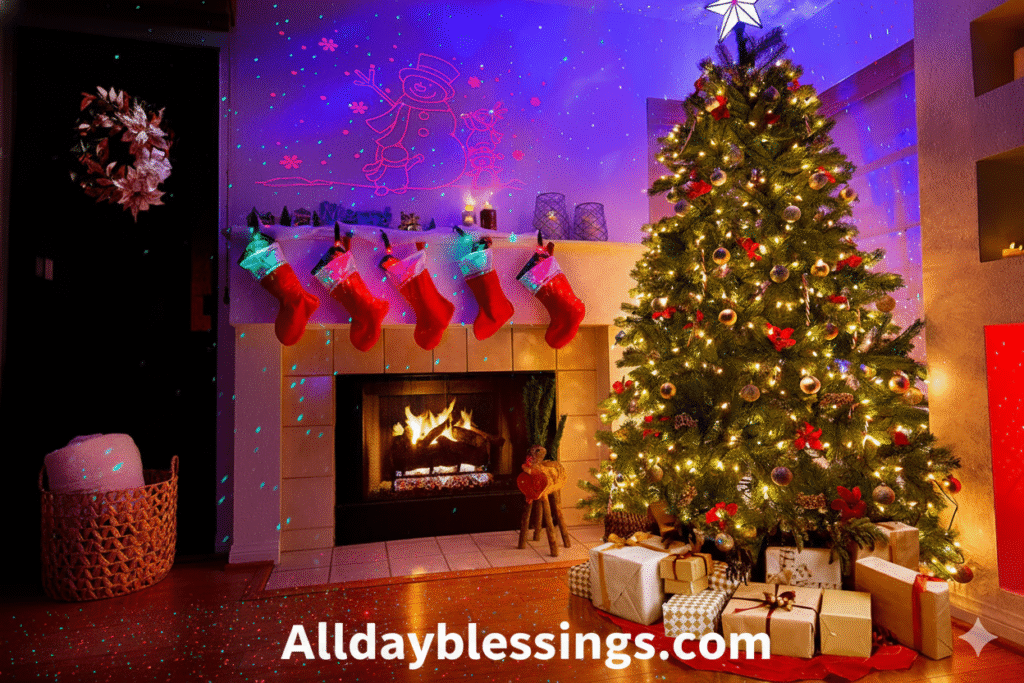
- Holiday images (Santa, trees, stockings)
- Combination effects (dots plus images)
Smart Features Worth Paying For
App Control Benefits:
- Create custom patterns and color schemes
- Schedule multiple timer programs throughout the week
- Sync multiple projector units for coordinated displays
- Voice control through Alexa or Google Home
- Share and download community-created designs
Music Sync Technology:
- Built-in microphone detects sound
- Patterns pulse and change with music rhythm
- Bluetooth speakers add audio to your light show
- Creates dynamic party atmosphere beyond holiday decorations
Technical Specifications Explained
Understanding technical details helps you make informed decisions and avoid compatibility issues that competitors rarely address.
Diffraction Technology Deep Dive
Quality laser christmas lights use diffraction gratings rated at 15,000-20,000 DPI (dots per inch). This specification determines how many individual light points the laser beam splits into:
- 15,000 DPI: 2,000-3,000 light points (entry-level)
- 17,500 DPI: 4,000-6,000 light points (mid-range)
- 19,500 DPI: 8,000-10,000 light points (premium)
Higher DPI creates denser, more impressive displays with better color saturation.
Laser Diode Configuration
Single Laser:
- One beam split by diffraction
- Limited brightness and coverage
- Budget option only
Dual Laser:
- Two synchronized beams
- Adequate for small to medium homes
- Common in $40-80 range
Triple Laser:
- Three independent laser sources
- Excellent coverage and brightness
- Sweet spot for most homeowners
Quad/Multiple Laser:
- Four or more beams
- Premium brightness for large homes
- Professional installation quality
Power Consumption Analysis
Laser christmas projector efficiency compared to traditional options:
| Lighting Type | Power Draw | Cost Per Month* | Equivalent Coverage |
| Traditional incandescent strings | 300-500W | $18-30 | 2,000 sq ft |
| LED string lights | 50-80W | $3-5 | 2,000 sq ft |
| Laser projector system | 8-15W | $0.50-$1 | 2,000 sq ft |
*Based on 6 hours daily operation, $0.12/kWh average electricity rate
The energy efficient advantage becomes dramatic when covering larger areas. A 5,000 square foot display might require $60-80 monthly in traditional lights versus $1-2 with laser lights.
RF Remote Range and Interference
Most remote control systems use RF (radio frequency) rather than infrared:
- RF range: 50-100 feet through walls
- 433 MHz frequency (standard)
- No line-of-sight required
- Immune to outdoor weather interference
Troubleshooting tip: If your remote becomes unresponsive, try replacing batteries first. RF interference from other devices (garage openers, wireless cameras) can occasionally cause issues—try changing the device’s position.
Thermal Management in Cold Climates
Quality outdoor laser lights include internal thermostats that regulate projector temperature:
- Automatic startup delays in extreme cold protect laser diodes
- Internal thermostat prevents damage from temperature shock
- Cold climate rated units operate down to -31°F
- Standard units function to 14°F reliably
Winter performance tip: Let your projector acclimate for 5-10 minutes after powering on in below-freezing temperatures. This extends component lifespan significantly.
Maintenance & Safety Tips
This comprehensive maintenance section addresses long-term care that competitors overlook, ensuring years of reliable performance.
Seasonal Maintenance Schedule
Before First Use (Fall):
- Clean lens covers with microfiber cloth and lens cleaner
- Inspect all cables for damage from summer storage
- Test remote batteries and replace if weak
- Verify ground stake or mounting hardware is tight
- Run through all patterns and colors to confirm function
Monthly During Use (Winter):
- Remove snow or ice accumulation from projector housing
- Check that waterproof seals remain intact
- Wipe moisture from lens if condensation occurs
- Verify timer continues operating correctly
- Inspect power adapter for any weather damage
End-of-Season Care (Spring):
- Clean thoroughly before storage
- Dry completely to prevent mold or corrosion
- Store in climate-controlled space if possible
- Keep original packaging for protective storage
- Organize remote and cables with the main unit
Annual Service (Summer):
- Deep clean all components
- Check for firmware updates (smart models)
- Test full functionality before storage
- Replace any worn gaskets or seals
- Document any issues for warranty claims
Lens and Housing Care
The lens represents the most critical component requiring careful maintenance:
Proper cleaning procedure:
- Never use paper towels or rough fabrics
- Use microfiber cloths designed for optics
- Apply lens cleaning solution, never household cleaners
- Wipe in circular motions from center outward
- Inspect for scratches that affect projection quality
Housing protection:
- Aluminum housing resists corrosion but can accumulate dirt
- Clean with mild soap and water
- Dry thoroughly to prevent water spots
- Touch up any paint chips to maintain waterproof integrity
Safety Guidelines and Precautions
Eye Safety: While Class 2 laser christmas lights are safe for normal use, follow these guidelines:
- Never stare directly into the laser beam at close range
- Position projector where beams don’t cross eye level at close distance
- Keep units out of children’s reach when operating
- Choose Class 2 certified products (maximum safe exposure)
Electrical Safety:
- Use GFCI outlets exclusively for outdoor installation
- Ensure power adapter ratings match your local voltage
- Never bypass waterproof caps or modify electrical components
- Unplug during electrical storms
- Check for cord damage before each season
Fire Prevention:
- Keep projector units away from flammable decorations
- Don’t cover ventilation ports with snow, leaves, or fabric
- Maintain 6-inch clearance around housing
- Laser systems generate minimal heat but ventilation remains important
Weather Considerations: Even with IP65 or IP67 rating protection:
- Position power adapter under shelter when possible
- Use weatherproof outlet covers
- Elevate connections above potential water pooling
- Secure cables to prevent wind damage
- Consider unplugging during severe ice storms
Troubleshooting Common Issues
Problem: Flickering or intermittent operation
- Check all cable connections for corrosion
- Verify outlet provides consistent power
- Test with different outlet to rule out electrical issues
- Inspect remote for signal interference
Problem: Patterns appear distorted or unclear
- Clean lens thoroughly
- Adjust projection distance (may be too close or far)
- Verify projector remains stable and hasn’t shifted
- Check for obstacles partially blocking beam
Problem: Colors appear washed out
- Increase distance from projection surface
- Use in darker conditions (not during twilight)
- Check if laser diodes need replacement (rare within warranty)
- Ensure power supply provides full voltage
Problem: Timer not activating automatically
- Reset timer programming through remote
- Verify power hasn’t been interrupted (resets some models)
- Check remote battery strength
- Consult manual for specific timer synchronization steps
Problem: Unit won’t power on after storage
- Allow projector to reach ambient temperature
- Check GFCI hasn’t tripped
- Verify power adapter connection is secure
- Test outlet with another device
Long-Term Durability Factors
Expected Lifespan:
- Quality laser diodes: 50,000-100,000 hours
- LED components: 25,000-50,000 hours
- Housing and mechanics: 5-10 years with proper care
- Remote control: 3-5 years (battery-dependent)
Warranty coverage typically includes:
- Manufacturing defects (1-2 years)
- Laser diode failure (often extended coverage)
- Electrical component failures
- Waterproof seal failures
Not usually covered:
- Physical damage from mishandling
- Lightning or power surge damage
- Lens scratches from improper cleaning
- Normal wear from excessive runtime
Environmental Considerations
Laser christmas lights offer environmental advantages:
- Energy efficient operation reduces carbon footprint
- No disposable bulbs creating waste
- Longer lifespan means less frequent replacement
- Reduced packaging waste versus yearly string light purchases
- No toxic materials in modern LED/laser systems
Disposal and recycling: When your projector eventually reaches end-of-life, recycle responsibly through electronics recycling programs. Many components contain recyclable metals and circuitry.
FAQ Section
Q: How many laser christmas lights do I need for my home?
A: Most standard homes (1,500-2,500 sq ft) need just one projector with 2,500-3,000 sq ft coverage. Larger homes over 3,000 sq ft benefit from two units positioned at different angles.
Q: Are laser christmas projector lights safe for eyes?
A: Yes, Class 2 certified laser lights are safe for normal use. Avoid staring directly into the beam at close range, just as you wouldn’t look directly at any bright light source.
Q: Can outdoor laser lights work in rain and snow?
A: Absolutely. Look for IP65 or IP67 waterproof ratings. These provide complete protection against rain, snow, and ice. The power adapter should be kept sheltered even with weather-resistant units.
Q: How much electricity do laser projector lights use?
A: Laser christmas lights consume only 5-15 watts, costing less than $2 monthly compared to $20-40 for traditional lights covering the same area. They’re extremely energy efficient.
Q: What’s the best distance for laser christmas projector placement?
A: Position your projector 15-30 feet from your house for optimal coverage. Too close creates small patterns; too far reduces brightness. Check your specific model’s projection distance specs.
Q: Do laser lights work on brick, siding, and textured surfaces?
A: Yes, laser patterns display beautifully on all surfaces including brick, vinyl siding, stucco, and wood. Textured surfaces actually enhance the visual depth of moving patterns.
Q: Can I use christmas laser lights year-round for other holidays?
A: Most modern laser projectors include patterns for multiple holidays—Halloween, July 4th, birthdays, and everyday landscape lighting. This year round operation maximizes your investment beyond just Christmas.
Q: How long do laser christmas lights last before replacement?
A: Quality laser diodes last 50,000-100,000 hours. Using 6 hours daily during a 60-day season, your projector should work perfectly for 15-20+ years before needing replacement.
Q: What’s better—laser lights or LED string lights?
A: Laser lights offer easier installation (5-10 minutes vs hours), better coverage (one unit vs multiple strings), lower energy costs, and zero maintenance. LED strings provide traditional aesthetic appeal.
Q: Do I need professional installation for laser projector lights?
A: No, laser christmas lights feature plug-and-play setup requiring zero technical expertise. Simply stake into the ground, plug in, aim at your house, and adjust settings with the remote control.
Conclusion
Laser christmas lights represent more than a decorating trend—they’re a fundamental shift in how homeowners approach holiday decorations. By eliminating the time-consuming hassle, safety risks, and ongoing maintenance of traditional lighting, outdoor laser lights deliver professional quality displays that once required expert installation and thousands of dollars.
This comprehensive guide has covered critical aspects that other resources overlook: real-world installation scenarios for challenging properties, detailed coverage calculations for specific home sizes, advanced troubleshooting solutions, and long-term maintenance strategies that extend your investment for decades.
The transformation potential extends beyond just Christmas. With year round versatility, energy efficient operation, and weatherproof durability, these projector systems enhance your home’s curb appeal through every season. Whether creating a festive atmosphere for holiday light displays, adding elegant landscape accents for dinner parties, or simply enjoying dynamic exterior lighting throughout the year, laser projector lights adapt to your lifestyle.
As you implement the strategies from this guide, remember that the best laser christmas lights system is one matched to your specific needs—coverage area requirements, climate conditions, desired features, and budget. Start with quality IP65 or IP67 rated units from reputable brands, follow the detailed installation guide provided, and maintain your projector properly for years of reliable performance.
Transform your home this season with the revolutionary power of laser christmas lights. Your neighbors will ask how you created such a spectacular display, and you’ll smile knowing it took less time than brewing your morning coffee.

I’m Watson, a faith-inspired writer passionate about sharing heartfelt blessings and uplifting words that bring peace, gratitude, and hope. Through my daily blessings, I aim to comfort the soul and inspire spiritual growth.