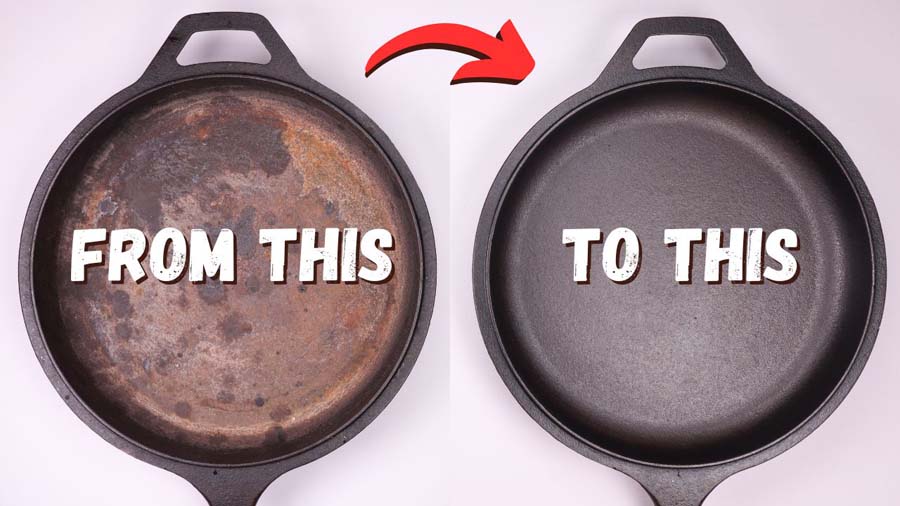
How to Season a Cast Iron Skillet? If you’ve ever wondered why your grandmother’s cast iron skillet glides like butter while yours resembles a sticky mess, the answer lies in one critical process: seasoning.
Learning how to season cast iron properly transforms a rough, rust-prone pan into a naturally non-stick surface that rivals modern cookware—without the chemicals.
This comprehensive guide walks you through everything you need to know about cast iron seasoning, from the science behind polymerization to step-by-step instructions for creating that coveted patina. Whether you’re restoring a cast iron skillet or maintaining a new Lodge pan, you’ll discover the best oils, techniques, and troubleshooting tips to keep your cookware performing flawlessly for generations.
Table of Contents
What is Cast Iron Seasoning? (The Science Explained)
Cast iron seasoning isn’t a spice blend—it’s a chemical process called polymerization that creates a protective, non-stick coating on your pan’s surface. When you apply a thin layer of oil and expose it to high heat, the fat molecules bond to the metal and to each other, forming a hard, glass-like layer that gets stronger with each use.
Here’s what happens during the seasoning process:
When cooking oil is heated beyond its smoke point (typically between 350 degrees F and 500 degrees F), it undergoes carbonization. The oil doesn’t just sit on the surface—it chemically transforms and bonds directly to the iron through oxidation. Each coat you apply adds another layer to this protective coating, gradually building up the dark, smooth patina that makes seasoned cast iron virtually stick-proof.
Think of it like varnishing wood: one coat provides minimal protection, but multiple layers create a durable finish. The same principle applies when you season your cast iron. Brands like Lodge often sell pre-seasoned cookware, but even these benefit from additional rounds of seasoning to improve the bonding to metal and enhance performance.
The key difference between properly seasoned and poorly seasoned pans comes down to oil selection and technique. Using the right neutral oil in a thin layer—rather than thick, gloppy coats—ensures even polymerization without sticky residue or flaking.
Why You Need to Season Cast Iron Cookware
Seasoning cast iron skillet surfaces serves three essential purposes that make this extra step absolutely worth the effort:
1. Creates a Natural Non-Stick Surface
A well-seasoned pan rivals expensive non-stick cookware without synthetic coatings. The polymerized oil layer fills the microscopic pores in the iron, creating a slick surface where eggs, pancakes, and delicate fish release effortlessly. Unlike chemical non-stick pans that degrade over time, your cast iron skillet actually improves with use—each cooking session adds to the seasoning.
2. Prevents Rust Formation
Raw iron oxidizes rapidly when exposed to moisture and air. The seasoning acts as a barrier, preventing water and oxygen from reaching the metal surface. This rust prevention is critical for longevity. Even a single night of leaving water in an unseasoned pan can create rust spots that require significant restoration work with steel wool or a chainmail scrubber.
3. Enhances Flavor and Heat Distribution
That legendary flavor associated with cast iron care comes partly from the patina—the accumulated layers of seasoning that develop unique character over years of cooking. The smooth, even surface also promotes better heat distribution, eliminating hot spots that cause uneven cooking. When you properly maintain cast iron, you’re investing in a pan that will outperform most modern cookware.
The Best Oils for Seasoning Cast Iron (Comparison Chart)
Not all oils work equally well for seasoning cast iron pan surfaces. The ideal cooking oil has a high smoke point and forms durable polymerized layers. Here’s a detailed comparison:
| Oil Type | Smoke Point | Seasoning Quality | Cost | Best For |
|---|---|---|---|---|
| Flaxseed Oil | 225°F | Excellent (hardest finish) | $$$ | Initial seasoning layers |
| Grapeseed Oil | 420°F | Excellent | $$ | All-purpose seasoning |
| Canola Oil | 400°F | Very Good | $ | Budget-friendly option |
| Vegetable Oil | 400-450°F | Very Good | $ | Oven seasoning method |
| Crisco/Shortening | 360°F | Good | $ | Traditional method |
| Lard | 370°F | Good | $$ | Authentic restoration |
| Avocado Oil | 520°F | Excellent | $$$ | High heat applications |
| Olive Oil | 325-375°F | Poor | $$ | Not recommended |
Top Recommendations:
Grapeseed oil offers the best balance of performance and affordability. It creates durable layers, has a high smoke point, and doesn’t leave sticky residue when properly applied. Many professional cooks swear by it for both initial seasoning and maintaining cast iron.
Flaxseed oil produces the hardest, most glass-like finish due to its unique fatty acid composition. However, it’s expensive and can sometimes flake if applied too thickly. Reserve it for the first 2-3 coats on bare metal, then switch to a more affordable option.
Canola oil and vegetable oil work beautifully for everyday re-seasoning and are readily available. They’re particularly good for the stovetop seasoning method where you’re cooking regularly and building layers gradually.
Avoid olive oil—its low smoke point prevents proper polymerization, often leaving a sticky, gummy residue that attracts food residue rather than repelling it.
What You’ll Need (Tools & Supplies Checklist)
Before you begin to season a skillet, gather these essential materials:
For the Seasoning Process:
- Your cast iron skillet or pan (cleaned and dried)
- Chosen seasoning oil (grapeseed, canola, or flaxseed)
- Paper towel or clean cloth (lint-free)
- Oven with a temperature range of 350-500 degrees F
- Aluminum foil or baking sheet (to catch drips)
- Kitchen timer
For Cleaning & Prep:
- Hot water
- Stiff brush or chainmail scrubber
- Kosher salt (for scrubbing)
- Steel wool (for rust removal if needed)
- Dish soap (yes, it’s okay in moderation!)
- Clean towels for drying
Optional But Helpful:
- Oven thermometer (for accuracy)
- Silicone oven mitts
- Fan or ventilation (the smoke point process can get smoky)
Most of these items are kitchen staples, making the seasoning process accessible without specialized equipment. The key is having quality paper towels that won’t leave lint and enough neutral oil to apply multiple thin layers.
How to Season Cast Iron: Step-by-Step Method
Method 1: Oven Seasoning (Recommended)
The oven seasoning method provides the most consistent results and is ideal for seasoning new or restored cast iron. This baking method ensures even heat distribution and superior bonding to metal.
Step 1: Clean the Pan Thoroughly
Start with a completely clean surface. If your pan is new and pre-seasoned (like most Lodge cookware), it still needs cleaning to remove factory residues. Wash with hot water and a small amount of soap. Don’t worry—soap on cast iron won’t harm established seasoning, and bare metal needs to be perfectly clean for proper polymerization.
For rusty pans, scrub with steel wool and kosher salt until you reach bare metal. Rinse and dry immediately.
Step 2: Dry Completely
Water is cast iron’s enemy. After washing, dry thoroughly with a towel, then place the pan on the stovetop over medium heat for 5 minutes to evaporate any remaining moisture. This step is crucial—even microscopic water droplets will interfere with the seasoning.
Step 3: Apply an Ultra-Thin Oil Layer
This is where most people go wrong. Pour about a teaspoon of your chosen oil (grapeseed, vegetable oil, or canola oil) into the pan. Using a paper towel or clean cloth, spread it across every surface—inside, outside, handle, and bottom.
Now here’s the critical part: wipe excess oil thoroughly. Buff the pan until it looks almost dry, like you’re trying to remove the oil. The layer should be so thin you can barely see it. Thick layers create sticky, gummy food residue instead of smooth polymerization.
Step 4: Position in Oven
Preheat your oven to 450 degrees F (some prefer 400 degrees F or 500 degrees F—all work). Line the bottom rack with aluminum foil to catch any drips. Place your pan upside down on the center rack. This positioning prevents oil from pooling in the pan and ensures even carbonization.
Step 5: Bake for 1 Hour
Set your timer for 1 hour. During this time, the oil will smoke as it reaches its smoke point and undergoes polymerization. Proper ventilation helps—open windows or run your exhaust fan. The smell is normal and indicates the chemical transformation creating your non-stick surface.
Step 6: Cool Completely
After 1 hour, turn off the oven but leave the pan inside. Let it cool for at least 45 minutes to 2 hours. This gradual cooling prevents thermal shock and allows the polymerized layer to fully harden.
Step 7: Repeat 3-6 Times
One round creates a base layer; multiple rounds build durable seasoning. Repeat the process 3-6 times for new or stripped pans. Each cycle adds depth to the patina and improves the non-stick properties. Yes, it takes time—expect to invest 4-6 hours total—but the results last for decades.
Method 2: Stovetop Seasoning
Stovetop seasoning works well for quick touch-ups and building seasoning through regular use. While not as thorough as the oven method for initial seasoning, it’s perfect for maintaining your pan.
Step 1: Clean and Dry
After cooking, clean your pan while still slightly warm. Use hot water and a brush to remove food residue. For stuck-on bits, sprinkle kosher salt and scrub with a chainmail scrubber. Rinse and dry thoroughly.
Step 2: Apply Thin Oil Coat
While the pan is still warm (not hot), add a small amount of cooking oil. Use a paper towel to spread a thin layer across all surfaces, then wipe excess until nearly dry.
Step 3: Heat Until Smoking
Place the pan over medium-high heat. Watch for the oil to start smoking—this indicates you’ve reached the smoke point and polymerization is occurring. Let it smoke for 1-2 minutes.
Step 4: Cool and Store
Remove from heat and let cool completely. This quick process adds micro-layers of seasoning with each use, gradually building the protective coating.
The stovetop method is less intensive but requires consistency. Think of it as maintenance rather than initial seasoning. Combined with regular cooking (especially with fats), this approach helps you maintain cast iron naturally.
How Many Times Should You Season a New Skillet?
The number of seasoning rounds depends on your starting point and desired performance level.
For New Pre-Seasoned Pans (Lodge, etc.):
Most modern cast iron comes pre-seasoned from the factory, but this initial layer is minimal. Add 3-4 rounds of oven seasoning before first use. This builds a stronger foundation and accelerates the development of reliable non-stick properties. You’ll notice dramatic improvement after just these few cycles.
For Vintage or Stripped Bare Metal:
Older pans like Griswold or fully restored cast iron need 5-6 rounds minimum. These heirloom pieces often have smoother surfaces than modern pans, which helps, but they start with zero protective coating. The extra layers ensure adequate rust prevention and bonding to metal.
Signs Your Seasoning is Sufficient:
- The pan displays a dark, semi-glossy appearance
- Water beads up and rolls off the surface
- A fried egg releases easily without sticking
- The pan feels smooth, not rough or tacky
Reality Check: Even after initial seasoning, your pan improves dramatically over the first 6 months of regular use. Each time you cook with fat, you’re adding micro-layers. The first few seasoning sessions create the base; daily cooking creates the legendary patina that makes vintage cast iron so prized.
Don’t expect perfection immediately. A brand-new pan, even properly seasoned, won’t perform like one that’s been loved for 20 years. That’s the beauty of cast iron—it rewards patience and use.
How to Maintain Your Cast Iron Seasoning
Maintaining cast iron is simpler than internet myths suggest. Follow these practical guidelines to preserve and strengthen your seasoning:
After Every Use:
- Clean while warm (not hot): Rinse with hot water immediately after cooking. Use a stiff brush or chainmail scrubber for stuck bits. The myth that soap destroys seasoning is outdated—modern dish soap is fine for quick cleaning, but hot water alone usually suffices.
- Dry thoroughly: Water is your enemy. Towel dry, then place on the stovetop over low heat for 2-3 minutes to evaporate all moisture.
- Apply a maintenance coat: While still warm, rub a tiny amount of neutral oil across the surface with a paper towel. Wipe excess until almost dry. This micro-layer maintains the protective coating.
Weekly or Bi-Weekly:
If you cook frequently, perform a quick stovetop seasoning once a week. Heat the oiled pan until smoking, then cool. This strengthens the patina and repairs minor wear from acidic foods.
What Enhances Seasoning:
- Cooking with fats: bacon, sausage, and sautéed vegetables in oil naturally build seasoning
- Searing meats at high heat
- Using lard or shortening occasionally
- Regular use (daily cooking is better than monthly)
What to Avoid:
- Letting water sit in the pan overnight
- Using metal spatulas aggressively on new seasoning
- Cooking highly acidic foods (tomatoes, vinegar) in newly seasoned pans
- Dishwashers (never!)
- Harsh detergents or scouring pads (except for restoration)
Think of cast iron maintenance like caring for leather boots—regular light attention beats neglect followed by intensive repair. A quick wipe with oil after each use takes 30 seconds but preserves years of accumulated seasoning.
Foods to Avoid in Cast Iron (And Why)
While seasoned cast iron is remarkably versatile, certain foods can damage new seasoning or absorb metallic flavors. Here’s what to approach with caution:
Highly Acidic Foods (First 6 Months):
Tomatoes, vinegar-based sauces, citrus, and wine can break down young seasoning layers. The acid reacts with the iron, potentially causing a metallic taste and degrading the protective coating. Once your pan develops a thick, well-established patina (usually after 6-12 months of regular use), acidic foods become less problematic for short cooking times.
Delicate Fish (Until Well-Seasoned):
Flaky fish like sole or flounder stick easily to pans without robust non-stick surfaces. Wait until your cast iron has developed a glass-smooth patina before attempting delicate proteins. Salmon and firmer fish work fine even on moderately seasoned surfaces.
Eggs (Initially):
This is the ultimate test of seasoning quality. If your eggs stick, your seasoning needs more development. Cook eggs only after 3-4 seasoning cycles and sufficient break-in time. Use plenty of fat initially.
Long-Simmering Acidic Dishes:
While quick sautés in tomato sauce are manageable on well-seasoned pans, avoid simmering marinara or cooking chili for hours. Extended exposure to acid will eventually wear down even mature seasoning.
When These Foods are Actually Fine:
Once your pan has 6+ months of regular use and a thick, black patina, most food restrictions disappear. Well-maintained vintage cast iron can handle almost anything. The key is building sufficient seasoning depth before challenging it.
Pro Tip: If you accidentally cook something acidic in a young pan and notice dull spots, simply perform an extra stovetop seasoning cycle to repair the damage. Minor seasoning loss isn’t catastrophic—it’s easily fixed.
How to Clean Seasoned Cast Iron Properly
Cleaning cast iron properly protects your seasoning while maintaining hygiene. The process is simpler than you think:
The Right-After-Cooking Method (Recommended):
- While the pan is still warm (not screaming hot), rinse under hot water
- Use a stiff brush, chainmail scrubber, or non-abrasive scrubber to remove food residue
- For stuck-on bits: sprinkle kosher salt and scrub with a damp cloth—the salt acts as a gentle abrasive
- Rinse thoroughly
- Dry immediately with a towel
- Place on stovetop over low heat for 2-3 minutes to completely evaporate moisture
- Apply a thin layer of cooking oil while still warm, then wipe excess
The Stubborn Food Method:
For really stuck-on food residue:
- Add water to the pan and bring to a simmer for 5-10 minutes—this loosens debris
- Pour out water while hot (use oven mitts!)
- Scrub with kosher salt and a chainmail scrubber
- Rinse, dry, and oil as above
The Soap Question:
Modern dish soap is fine for seasoned cast iron. The old warning came from lye-based soaps that actually did strip seasoning. Today’s mild detergents won’t harm polymerized oil layers. That said, hot water usually suffices for daily cleaning.
What NEVER to Do:
- Don’t soak overnight—this causes rust
- Don’t use steel wool on established seasoning (save it for rust removal)
- Don’t put in the dishwasher (extreme heat and harsh detergents strip seasoning)
- Don’t air dry—always dry immediately to prevent rust prevention failure
Storage Tips:
Store cast iron in a dry place. If stacking multiple pans, place paper towels between them to prevent moisture accumulation and protect the seasoning. Some people store pans with a light coat of oil and a paper towel inside for extra rust prevention.
Troubleshooting Common Seasoning Problems
Why Is My Cast Iron Sticky?
A sticky, tacky surface indicates seasoning problems, usually from too much oil or insufficient heat. Here’s how to fix it:
Causes:
- Applied oil too thickly—excess oil can’t fully polymerize
- Didn’t wipe excess oil thoroughly before heating
- Oven temperature too low (below 350 degrees F)
- Insufficient baking time (less than 45 minutes)
Solution:
Place the sticky pan in a 450-500 degrees F oven for 1 hour. The high heat will complete the polymerization process, hardening the gummy layer. If it remains sticky after cooling, you may need to strip the seasoning and start over. To strip: scrub with steel wool or use the self-cleaning oven cycle (controversial but effective), then re-season properly with thin layers.
Prevention:
The mantra is “wipe it like you hate it.” After applying oil, buff vigorously until the pan looks almost dry. When in doubt, wipe more. A properly applied coat looks barely there.
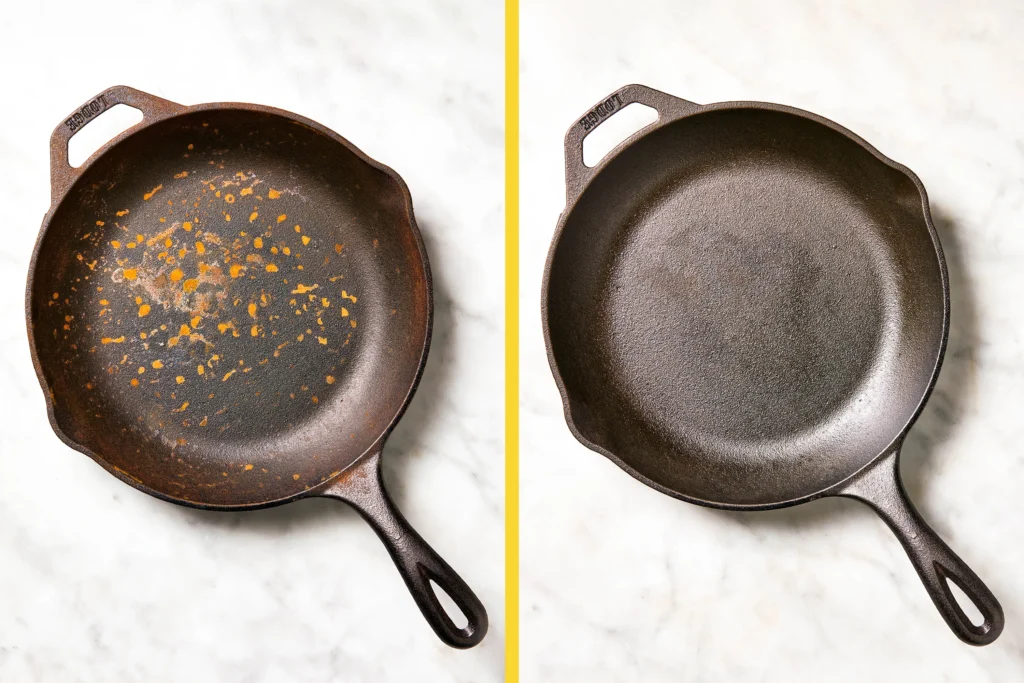
Why Is My Cast Iron Rusty?
Rust appears when moisture reaches the iron surface, indicating seasoning breakdown or improper drying.
Causes:
- Left water in the pan
- Stored in humid environment
- Seasoning worn through from acidic foods or aggressive scrubbing
- Insufficient drying after cleaning
Quick Fix for Minor Rust:
- Scrub rust spots with kosher salt and a damp cloth or steel wool
- Rinse and dry thoroughly
- Heat on stovetop to ensure complete dryness
- Apply thin layer of oil
- Perform 1-2 rounds of oven seasoning to restore the protective coating
Heavy Rust Restoration:
For extensive rust, you’ll need to fully restore cast iron:
- Scrub with steel wool until all rust is removed (reaching grey metal)
- Wash with soap and hot water
- Dry completely
- Perform 5-6 full seasoning cycles to rebuild the patina
Prevention:
Always dry immediately after cleaning. Use stovetop heat to evaporate moisture. Apply a maintenance coat of oil after each use. Store in a dry location.
Why Is Food Sticking?
Food sticking to your seasoned cast iron frustrates everyone, but it’s solvable.
Common Causes:
- Seasoning not sufficiently developed (needs more layers)
- Pan not preheated properly before adding food
- Insufficient cooking fat
- Trying to flip food before it naturally releases
- Cooking delicate foods too soon on new seasoning
Immediate Fixes:
- Preheat thoroughly: Place pan over medium heat for 5-7 minutes before adding oil and food. Properly preheated cast iron naturally releases food better.
- Use adequate fat: Don’t skimp on oil, butter, or lard. The fat works with the seasoning to create a non-stick surface.
- Don’t rush the flip: Proteins release when properly seared. If it sticks, wait 30-60 seconds longer before attempting to flip.
Long-Term Solution:
Your pan needs more seasoning development. Perform 2-3 additional oven seasoning cycles. Then cook fatty foods (bacon, sausage, roasted vegetables with oil) for the next few weeks. Each use builds the patina. Within a month of regular cooking, sticking issues typically resolve.
Pro Tip: Test seasoning quality with the water droplet method. Flick water on a hot, dry pan—if it beads up and dances, your seasoning is solid. If it immediately evaporates or spreads, you need more seasoning layers.
FAQs About Cast Iron Seasoning
Can you over-season cast iron?
Not really. Multiple seasoning layers create a thicker, more durable patina. However, applying oil too thickly during each round creates sticky buildup rather than proper polymerization. Focus on thin layers rather than frequency.
How often should I re-season my cast iron?
With proper maintenance, you rarely need full re-seasoning. The stovetop seasoning method after cleaning and regular cooking with fats continuously rebuild seasoning naturally. Complete stripping and re-seasoning is only necessary if you’ve damaged the patina severely or restored a rusty pan.
Is flaxseed oil really the best for seasoning?
Flaxseed oil creates the hardest initial finish but can be brittle and flake with high heat or temperature changes. Grapeseed oil offers better durability for most home cooks. Canola, vegetable oil, and shortening all work excellently and cost less. The “best” oil is the high smoke point oil you’ll actually use consistently.
Can I use olive oil for seasoning?
Avoid olive oil for seasoning—its low smoke point (around 325-375 degrees F) prevents proper polymerization. It tends to leave sticky residue rather than forming hard, protective layers. Save olive oil for cooking in already seasoned pans.
Do I need to season pre-seasoned cast iron like Lodge?
Yes, but not as extensively. Pre-seasoned pans have a basic factory coating that benefits from 3-4 additional rounds of oven seasoning. This strengthens the protective coating and accelerates the development of truly non-stick properties. Think of factory seasoning as a primer—you’re adding the topcoat.
Can I use soap on cast iron?
Modern mild dish soap won’t harm properly seasoned cast iron. The old warning stems from vintage lye-based soaps. Today’s formulas are safe. That said, hot water and a brush handle most cleaning, so soap is optional rather than necessary.
Why does my cast iron look blotchy?
Blotchy or uneven coloring is normal, especially during the first months. Different seasoning thickness creates varied coloration. As you continue cooking, the patina evens out. Only worry if you see rust (reddish-brown) or sticky spots.
Can I cook eggs in cast iron immediately after seasoning?
Wait until you’ve built up a solid patina—usually after 4-5 seasoning cycles plus 2-3 weeks of regular cooking with fats. Eggs are the ultimate sticking test and require well-developed non-stick surfaces. Start with less challenging foods like bacon or roasted vegetables.
What temperature should I season cast iron at?
450 degrees F works best for most oils. Some prefer 400 degrees F or 500 degrees F. The key is exceeding your oil’s smoke point to trigger polymerization. Check your specific oil’s smoke point and aim for 25-50 degrees F above it.
How long does cast iron seasoning last?
With proper maintenance, seasoning lasts indefinitely and actually improves over time. Vintage pans from the 1950s still have their original patina. Each use adds to the protective coating, creating that legendary black, glossy surface that can outlast you.
Final Thoughts
Seasoning cast iron transforms a simple piece of metal into a culinary heirloom that improves with every meal. While the initial seasoning process requires 4-6 hours of oven time spread across multiple cycles, you’re investing in cookware that will serve your family for generations.
The beauty of cast iron care lies in its simplicity: clean, dry, apply a thin layer of oil, and heat. Repeat this basic cycle, and you’ll develop a naturally non-stick surface that rivals any modern pan—without chemicals, without coatings that flake, and without planned obsolescence.
Whether you’re restoring a rusty Griswold skillet discovered at a garage sale or seasoning a new Lodge pan, remember that perfection takes time. Your pan won’t achieve its legendary non-stick properties overnight, but each cooking session, each application of grapeseed oil, and each round of maintenance builds toward that prized patina.
Start seasoning today with the oven method, maintain it with simple stovetop touch-ups, and cook regularly with fats. Within months, you’ll understand why cast iron enthusiasts treasure their skillets like family heirlooms. This isn’t just cookware—it’s a lifetime cooking companion that actually gets better as you use it.
Your perfectly seasoned cast iron skillet awaits. Time to get started.

I’m Watson, a faith-inspired writer passionate about sharing heartfelt blessings and uplifting words that bring peace, gratitude, and hope. Through my daily blessings, I aim to comfort the soul and inspire spiritual growth.