
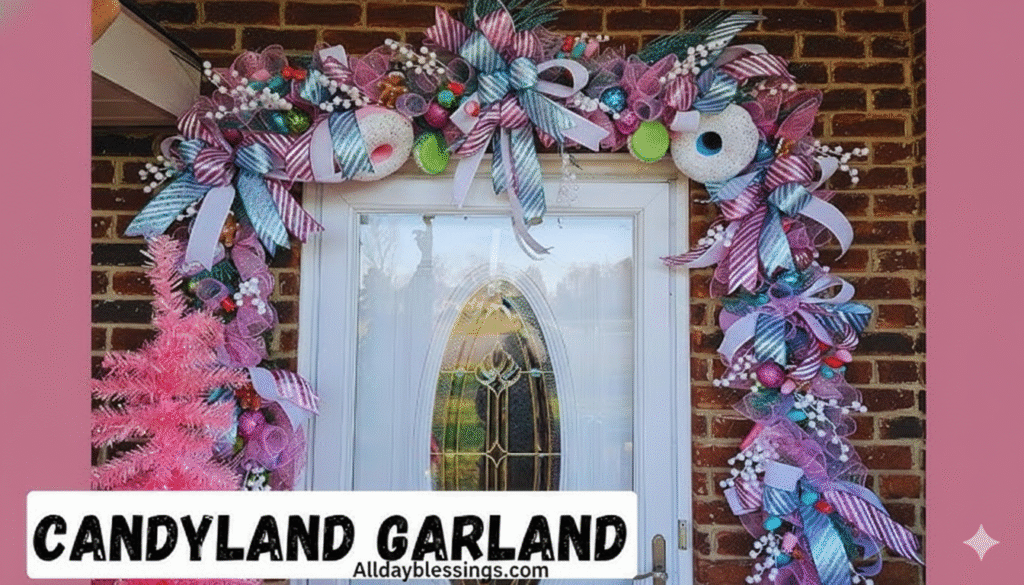
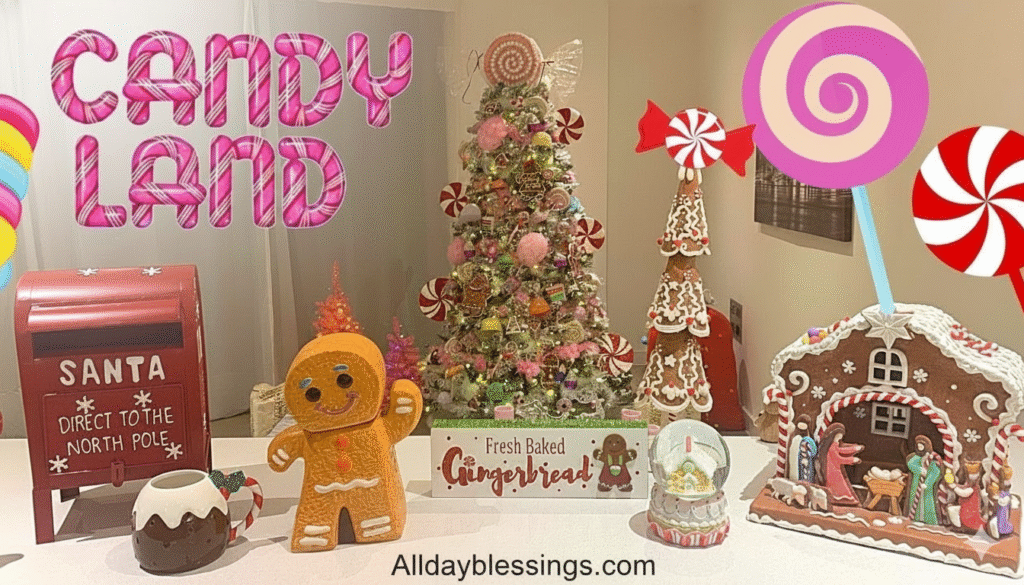
Transform your home into a whimsical candy land wonderland this holiday season without breaking the bank! If you’re searching for budget-friendly candyland Christmas decorations, you’ve come to the right place. This comprehensive guide will show you how to make candyland Christmas decorations using inexpensive supplies from Dollar Tree and basic craft supplies you probably already have at home.
Whether you’re planning outdoor decorations for your yard, indoor decorations for your tree, or creating a magical Santa photo spot, these easy DIY projects are perfect for the whole family.
Let’s dive into the most simple and affordable candy themed holiday decor ideas for 2025!
Table of Contents
Why Choose Dollar Tree for Candyland Christmas Decorations?
Dollar Tree has become the ultimate destination for affordable Christmas crafters, and for good reason. Here’s why shopping at your local dollar store makes perfect sense for your candyland theme projects:
- Cost Savings: Every item costs just $1.25, making it incredibly cheap to create stunning festive displays. Compare this to specialty craft stores where a single ornament can cost $5-10, and you’ll understand why budget decorators love Dollar Tree.
- Variety of Supplies: From cellophane wrap to paper lanterns, plastic plates to colorful bowls, Dollar Tree stocks all the basics you need for handmade candy decorations. Their seasonal sections in 2025 are better stocked than ever with bright colors perfect for a candy-land aesthetic.
- Family-Friendly Projects: These quick DIY projects are perfect for involving kids. Spending a Saturday afternoon creating homemade Xmas decor builds memories while decorating your home for the holidays.
- Consistency: Unlike thrift stores where inventory varies, Dollar Tree maintains consistent stock nationwide, making it easier to find exactly what you need for these step-by-step instructions.
- Eco-Friendly Option: Many Dollar Tree items can be reused year after year, and you’re repurposing everyday items into beautiful decorations rather than buying expensive single-use products.
Essential Supplies from Dollar Tree
Before starting your candyland Christmas crafting adventure, here’s your complete shopping list organized by project. Stock up on these inexpensive items during your next dollar store trip:
Core Crafting Supplies (Every Project Needs These)
| Supply Item | Typical Uses | Approximate Quantity Needed |
| Hot glue gun & glue sticks | All projects | 1 gun, 20-30 sticks |
| Cellophane wrap (clear) | Candy balls, wrapped candies | 2-3 rolls |
| Rubber bands (assorted colors) | Securing cellophane | 2 packs |
| Twine or ribbon | Garlands, bows | 3-4 spools |
| Plastic plates (white, 9-inch) | Lollipops, peppermints | 20-30 plates |
| Bamboo skewers (long) | Lollipop sticks, supports | 3-4 packs |
Specific Project Supplies
| Item | Project Use | Cost per Unit |
| Paper lanterns (round, various sizes) | Giant candy balls | $1.25 each |
| Colorful plastic bowls | Hard candies, sundaes | $1.25 each |
| Pool noodles (red, white, pastel) | Candy canes, archways | $1.25 each |
| Small plastic ball ornaments | Sundae toppings, garland | $1.25 per pack |
| Metallic foil wrapping paper | Candy bar wrappers | $1.25 per roll |
| Foam balls (various sizes) | Gumdrops, candy bases | $1.25 per pack |
| Paint pens or acrylic paint | Designs, swirls | $1.25 each |
| Parchment paper | Peppermint candies | $1.25 per pack |
| Plastic straws | Popcorn garland | $1.25 per pack |
Optional Enhancement Supplies
- Glitter spray paint (pastel colors recommended for 2025 trends)
- Battery-operated LED string lights
- Floral wire (green)
- Spray adhesive
- Bingo chips (white, for peppermint)
- Decorative crushed glass (rock candy effect)
Pro Tip: Visit Dollar Tree in early October for the best selection. Their 2025 Christmas inventory arrives earlier each year, and popular items sell out quickly in November.
Easy Candyland DIY Projects (Step-by-Step)
Now let’s create your candy themed Christmas wonderland! Each project includes difficulty level, time estimates, and kid-friendly ratings.
Giant Candy Balls (Paper Lantern Method)
Difficulty: Easy ⭐
Time: 15 minutes per candy
Kid-Friendly: Ages 8+ with supervision
Cost: $2.50-$3.75 per candy
These oversized wrapped candies are showstoppers for your outdoor display or indoor festive spaces.
Materials Needed:
- 1 round paper lantern (8-12 inch diameter)
- Cellophane wrap (enough to wrap completely)
- 2 rubber bands (coordinating color)
- Optional: LED battery light to place inside
Step-by-Step Instructions:
- Prepare Your Lantern: Open the paper lantern fully according to package directions. If you want it illuminated, insert a battery-operated LED light before wrapping.
- Cut Cellophane: Measure and cut a piece of cellophane wrap large enough to wrap around the entire lantern with at least 6 inches extending beyond each side.
- Center and Wrap: Place the lantern in the center of your cellophane. Gather one side of the cellophane and twist it tightly, securing with a rubber band about 3-4 inches from the lantern.
- Secure Second Side: Repeat on the opposite side, making sure the cellophane is smooth around the lantern with no wrinkles.
- Fluff the Ends: Fan out the twisted cellophane ends to create a classic wrapped candy appearance.
- Color Variations: Create variety by using different colored paper lanterns (red, green, pink, blue) or layering colored cellophane over white lanterns for a pastel candy effect popular in 2025 trends.
Display Ideas: Hang from porch ceilings, attach to fences, place along walkways, or cluster at different heights for dimension.
DIY Lollipop Decorations
Difficulty: Easy ⭐
Time: 20 minutes per lollipop
Kid-Friendly: Ages 6+ (perfect family craft!)
Cost: $1.25-$2.50 per lollipop
These giant candy decorations add vibrant pops of color to your yard or along your driveway.
Materials Needed:
- 2 plastic plates per lollipop (9-inch works best)
- 1 long bamboo skewer or wooden dowel
- Hot glue gun and glue sticks
- Paint pens or acrylic paint (bright colors)
- Optional: Clear spray sealer for outdoor durability
Step-by-Step Instructions:
- Create the Swirl Design: On the back side of one plate, draw a spiral swirl design using paint pens. Start from the center and spiral outward. Popular color combinations:
- Classic: Red and white
- Pastel: Pink and white
- Festive: Green and red
- Rainbow: Multiple colors in stripes
- Attach the Stick: Apply hot glue along the center back of your decorated plate. Press the skewer firmly into the glue, holding for 30 seconds.
- Seal with Second Plate: Apply hot glue around the entire rim of the second plate. Press firmly against the first plate (right sides facing out) to sandwich the skewer between them.
- Reinforce the Edge: Run a bead of hot glue around the entire outer edge where the two plates meet for extra strength.
- Weather Protection: If using outdoors, spray with 2-3 coats of clear acrylic sealer, allowing drying time between coats.
Sizing Options:
- Small (6-inch plates): Perfect for Christmas tree ornaments
- Medium (9-inch plates): Great for yard stakes
- Large (12-inch plates): Stunning focal points
Installation Tips: For outdoor displays, insert the skewer end into the ground at least 6 inches deep. For hard surfaces, secure in planters filled with sand or stones.
Pool Noodle Candy Canes
Difficulty: Medium ⭐⭐
Time: 30-45 minutes per candy cane
Kid-Friendly: Ages 10+ (cutting required)
Cost: $2.50-$3.75 per candy cane
Transform cheap pool noodles into classic candy cane decorations perfect for lining walkways or creating archways.
Materials Needed:
- 1 red pool noodle
- White athletic tape or white duct tape
- Clear fishing line or sturdy wire
- Scissors or serrated knife
- Optional: Wooden stake for ground mounting
Step-by-Step Instructions:
- Prepare the Noodle: If creating a traditional candy cane shape, keep the full length. For smaller versions, cut to desired size using a serrated knife.
- Create the Stripes: Starting at one end, wrap white athletic tape around the pool noodle in a diagonal spiral pattern. Space your stripes 2-3 inches apart for classic candy cane appearance. Keep the tape taut and smooth as you wrap.
- Shape the Curve: For the signature candy cane hook:
- Measure down 12-15 inches from one end
- Carefully bend the noodle to create the curved top
- Use clear fishing line to maintain the curve by wrapping it around the bent section
- The fishing line is invisible from a distance but holds the shape perfectly
- Add Support Structure: For outdoor displays, insert a wooden dowel or thick skewer into the bottom end of the noodle to create a stake for pushing into the ground.
- Weather Sealing: Wrap the entire candy cane in cellophane wrap for added weather protection and extra shine.
Creative Variations:
- Peppermint stick: Use white noodles with red tape
- Pastel candy canes: Pink, blue, or green noodles with white stripes
- Rainbow: Multi-colored tape on white noodles
- Mini versions: Cut noodles into 12-inch sections for smaller spaces
Archway Project: Connect 3-4 pool noodles together using hot glue and internal wire support to create a candy cane archway entrance. Secure in weighted bases like flower pots filled with concrete.
Ice Cream Sundae Decorations
Difficulty: Easy ⭐
Time: 25 minutes per sundae
Kid-Friendly: Ages 7+ with supervision
Cost: $3.75-$5.00 per sundae
These adorable sundae decorations are perfect for porch displays or as table centerpieces.
Materials Needed:
- 2 large colorful bowls (same size)
- Pool noodle pieces (cut into small chunks)
- Small plastic ball ornaments (red works great for cherries)
- Kitchen garbage bag
- Hot glue gun
- Paint pens (for sprinkles)
- Optional: Upside-down terracotta flower pot for base
Step-by-Step Instructions:
- Create the Ice Cream: Using a serrated knife, cut a pool noodle into small 1-2 inch chunks. You’ll need enough to fill a large bowl (approximately one full noodle per sundae).
- Contain the “Ice Cream”: Place all pool noodle pieces inside a clear or white kitchen garbage bag to keep them together and make the sundae weatherproof.
- Construct the Bowl Base: Apply hot glue around the entire rim of one bowl. Press the second bowl firmly against it (bottoms facing out) to create a sphere shape.
- Add the Ice Cream: Before fully sealing, stuff the bagged pool noodle pieces into one bowl. Then complete sealing the bowls together. The foam chunks should fill the bowl and be visible through the top opening.
- Add Toppings: Hot glue a red ball ornament on top to represent a cherry. Use paint pens to add colorful “sprinkle” dashes around the ice cream portions.
- Create the Stand: Turn a terracotta flower pot upside down and place your sundae on top for perfect display height. Secure with hot glue if needed.
Color Combinations for Different Flavors:
- Strawberry: Pink bowl with pink pool noodle
- Mint chocolate chip: Green bowl with white noodle chunks + brown painted chips
- Neapolitan: Alternate pink, white, and brown noodle pieces
- Rainbow sherbet: Multi-colored noodle pieces
Display Suggestions: Place sundae decorations on either side of your front door, cluster 3-5 on a porch table, or line your walkway for a sweet entrance.
Peppermint Candy Sprays
Difficulty: Medium ⭐⭐
Time: 45 minutes for 6-8 sprays
Kid-Friendly: Ages 12+ (detailed work)
Cost: $5.00 for multiple sprays
These peppermint candy picks add professional-looking flair to your candy themed tree or floral arrangements.
Materials Needed:
- White bingo chips (or cut circles from white plastic plates)
- Green floral wire (18-gauge)
- Hot glue gun
- Parchment paper
- Red paint pen or permanent marker
- Wire cutters
Step-by-Step Instructions:
- Prepare Your Workspace: Cover your work surface with parchment paper. This prevents hot glue from sticking to your table.
- Cut Wire Lengths: Use wire cutters to cut floral wire into 8-10 inch pieces. You’ll need one piece per peppermint candy.
- Create the Sandwich:
- Place a bingo chip flat on the parchment paper
- Apply a dot of hot glue to the center
- Immediately lay the floral wire on top, with about 1 inch of wire touching the glue
- Quickly place another bingo chip on top, pressing firmly
- Hold for 15-20 seconds until set
- Add Peppermint Design: Using a red paint pen, draw lines from the center to the edge of the white circle, creating the classic peppermint swirl pattern. Alternate drawing every other section for the iconic look.
- Seal and Protect: Once the paint is completely dry, seal with clear acrylic spray if desired.
- Create Clusters: Twist 3-4 wire stems together to create fuller Christmas tree picks. Leave the bottom 3-4 inches of wire separated for easier insertion into trees or wreaths.
Usage Ideas:
- Insert into your candy themed Christmas tree
- Add to wreaths for extra dimension
- Create a garland by connecting multiple clusters
- Fill in gaps in floral arrangements
- Make a centerpiece by clustering in a vase
Advanced Variation: Make different candy types using the same technique:
- Gumdrops: Use colored chips without painting
- Peppermint mints: Smaller circles with subtle swirls
- Hard candies: Add glitter to the hot glue before sealing
Decorating Your Candyland Christmas Tree
Your Christmas tree is the centerpiece of your candy land theme, and with these budget-friendly ideas, you’ll create a stunning display that rivals any store-bought version.
Theme Direction: Pastel vs Traditional
2025 trends lean heavily toward pastel candy aesthetics, but traditional bright colors remain timeless. Here’s how to execute each:
Pastel Candyland Theme (Trending in 2025):
- Color palette: Soft pink, mint green, baby blue, lavender, cream
- Ornament style: Matte finishes, pastel ball ornaments
- Ribbon: White or cream with subtle sparkle
- Tree: White flocked or frosted tree works beautifully
- Overall feel: Dreamy, whimsical, Instagram-worthy
Traditional Bright Candyland:
- Color palette: Cherry red, emerald green, bright yellow, royal blue
- Ornament style: Glossy, shiny finishes
- Ribbon: Bold red and white striped
- Tree: Classic green tree
- Overall feel: Nostalgic, cheerful, family-friendly
Essential Tree Decorations
Candy Ornament Ideas:
- Wrapped Candy Ornaments: Use small ball ornaments wrapped in cellophane wrap with twisted ends
- Lollipop Ornaments: Mini versions using 6-inch plastic plates
- Gumdrop Ornaments: Paint foam balls in bright colors and coat with glitter
- Candy Cane Hooks: Actual candy canes serve double duty as ornaments and hooks
- Rock Candy Clusters: Hot glue decorative crushed glass onto foam balls and add ribbon loops
Tree Picks and Sprays:
- Peppermint candy sprays (from our DIY above)
- Ribbon poofs in coordinating colors
- Faux gingerbread picks
- Cupcake ornaments (make using foam and paint)
- Cotton candy puffs (tulle gathered and fluffed)
Garland Ideas:
Create homemade popcorn and candy garland:
- String alternating white “popcorn” (small foam balls) with red ornaments
- Use twine and a large yarn needle
- Space evenly for professional appearance
- Wrap around tree in loose spiral
Tree Topper Options:
- Giant lollipop made from larger plates
- Oversized peppermint swirl
- Candy cane cluster
- Tulle poof with candy embellishments
- Light-up gingerbread house
Layering Your Tree
For professional results, follow this step-by-step layering approach:
- Lights First: String lights before anything else (warm white for pastel themes, multi-colored for traditional)
- Garland Layer: Wrap your handmade garland loosely around the tree
- Large Ornaments: Place biggest pieces first, spacing evenly
- Ribbon: Weave ribbon through branches in a loose cascade
- Medium Ornaments: Fill in gaps with mid-sized decorations
- Picks and Sprays: Insert peppermint sprays and other picks deep into the tree
- Small Accents: Add tiny gumdrops, small candies, final touches
- Tree Topper: Crown your creation
Pro Tip: Step back every few minutes to check balance. Take photos from different angles to spot gaps or heavy areas.
Outdoor Candyland Yard Display Ideas
Take your candy land magic outside with these outdoor decorations that will make your home the talk of the neighborhood this holiday season.
Walkway Wonderland
Transform your walkway into a path through candy land:
Candyland Pathway Markers:
- Line both sides with DIY lollipop stakes (space 2-3 feet apart)
- Alternate colors: red, white, green, pastel pink
- Angle them slightly inward to frame the path
- Add solar lights between lollipops for nighttime magic
Painted Paver Path:
- Paint square pavers in bright colors to resemble a gameboard
- Use outdoor paint in reds, greens, yellows, blues
- Seal with weatherproof coating
- Arrange in hopscotch pattern leading to your door
- Alternative: Use sidewalk chalk on existing concrete for temporary designs
Candy Border Lights:
- Wrap candy cane pool noodle creations with LED string lights
- Place every 3-4 feet along the walkway
- Use stakes to secure in ground
- Battery-operated lights avoid extension cord hassles
Front Porch Paradise
Your porch is prime real estate for festive displays:
Candy Cane Archway:
- Create an entrance arch using connected pool noodles
- Mount in large planters filled with concrete or sand
- Wrap with white lights
- Add a “Welcome to Candyland” sign
Porch Pillar Wrapping:
- Wrap porch columns in red and white striped patterns using crepe paper or fabric
- Add oversized bows at top and bottom
- Attach giant candy balls at various heights
Door Decoration:
- Center a large wreath made from foam gumdrops
- Flank door with ice cream sundae decorations on upside-down pots
- Add a “Santa‘s Candy Workshop” personalized sign
Rocking Chair Transformation:
- Place wrapped candy balls on chairs
- Drape candy garland across chair backs
- Add throw pillows in candy patterns
Yard Focal Points
Giant Candy Garden:
- Cluster multiple giant candy decorations in a garden bed or yard corner
- Include: lollipops, wrapped candies, candy canes, sundaes
- Add height variety: short (sundaes), medium (wrapped candies), tall (lollipops)
- Mulch around bases to hide stakes and supports
Gingerbread House Display:
- Create a large gingerbread house facade using cardboard boxes
- Paint brown and add white “frosting” details
- Surround with smaller candy decorations
- Perfect photo opportunity spot
Inflatable Additions (if budget allows):
- Supplement DIY pieces with affordable inflatables
- Gingerbread men, candy canes, Santa figures fit the theme
- Dollar stores sometimes carry smaller inflatables cheap
Lighting Your Display
Outdoor lighting makes your candy land display magical after dark:
- Spotlight giant candy pieces from below
- Wrap candy canes with LED strips
- Use colored floodlights (pink, blue, green) for pastel effects
- Place battery-operated candles inside translucent candy pieces
- Project snowflake or candy patterns on your house exterior
Budget Breakdown: Cost Per Project
Let’s break down exactly what you’ll spend on these inexpensive candy themed projects. All prices based on 2025 Dollar Tree pricing ($1.25 per item).
Individual Project Costs
| Project | Materials Cost | Quantity You Can Make | Cost Per Unit |
| Giant Candy Balls | $5.00 (lantern, cellophane, rubber bands) | 2 candies | $2.50 each |
| DIY Lollipops | $8.75 (plates, skewers, paint pens) | 7 lollipops | $1.25 each |
| Pool Noodle Candy Canes | $3.75 (noodle, tape) | 1 candy cane | $3.75 each |
| Ice Cream Sundaes | $5.00 (bowls, noodle, ornaments) | 1 sundae | $5.00 each |
| Peppermint Sprays | $6.25 (chips, wire, glue) | 10-12 sprays | $0.52 each |
Complete Display Budget Examples
Starter Candyland Package ($50-75):
- 4 giant candy balls
- 8 lollipop stakes
- 4 candy canes
- 2 sundaes
- 1 set peppermint sprays
- Basic hot glue gun and supplies
- Total Cost: Approximately $65-70
Full Yard Display ($150-200):
- 8 giant candy balls
- 15 lollipops (various sizes)
- 8 candy canes
- 4 sundaes
- 20 peppermint sprays
- Candy cane archway
- Hot glue gun, paint supplies, cellophane
- Total Cost: Approximately $175-185
Complete Indoor & Outdoor Package ($250-300):
- Everything from Full Yard Display
- Plus: Tree ornaments, garland, tree topper
- Additional craft supplies and embellishments
- Extra lighting elements
- Total Cost: Approximately $275
Cost Comparison: DIY vs Store-Bought
| Item Type | Store-Bought Price | Dollar Tree DIY Price | Savings |
| Giant yard candy decoration | $25-$45 each | $2.50-$5.00 each | 80-90% |
| Lollipop yard stake | $15-$30 each | $1.25 each | 92-96% |
| Candy cane outdoor decoration | $20-$35 each | $3.75 each | 81-89% |
| Candy themed tree ornaments (set of 12) | $30-$60 | $15-$20 | 50-67% |
| Complete candyland display | $500-$1000+ | $150-$250 | 70-80% |
Money-Saving Tips:
- Shop Dollar Tree early in the season (October) for best selection
- Buy in bulk when possible (multiple pool noodles, plate packs)
- Reuse supplies across multiple projects (one hot glue gun does everything)
- Save and store decorations properly to reuse for years
- Split costs with neighbors or friends making similar projects
- Use coupons at craft stores for items not available at Dollar Tree
- Check clearance sections for complementary items
Time Investment
Beyond money, consider time budget:
| Project | Prep Time | Creation Time | Total Time |
| Giant Candy Balls | 5 min | 10 min | 15 min each |
| Lollipops | 5 min | 15 min | 20 min each |
| Candy Canes | 10 min | 30 min | 40 min each |
| Sundaes | 10 min | 15 min | 25 min each |
| Peppermint Sprays | 15 min | 30 min (batch) | 45 min (8-10 pieces) |
Weekend Project Plan: Most families can complete a full yard display in one weekend:
- Saturday: Shopping and project prep (2-3 hours)
- Saturday afternoon: Create all pieces (4-6 hours with family help)
- Sunday: Assembly, installation, adjustments (2-3 hours)
Tips for Making Decorations Last
Protect your handmade investments with these preservation strategies:
Weather Protection for Outdoor Decorations
Rain and Snow Defense:
- Apply 2-3 coats of clear acrylic sealer to all painted surfaces
- Use weatherproof hot glue sticks rated for outdoor use
- Double-wrap outdoor pieces in cellophane for extra moisture barrier
- Bring in delicate items during severe weather
- Store in garage or shed during extreme cold snaps
Wind Prevention:
- Secure all yard decorations with stakes driven at least 8-10 inches deep
- Add weight to bases using sand, stones, or concrete in planters
- Use fishing line to tether tall items to porch posts or stakes
- Group items together for stability
- Check and retighten weekly throughout the season
Sun Fade Protection:
- Choose UV-resistant spray sealers
- Position decorations in partially shaded areas when possible
- Rotate display pieces weekly to even out sun exposure
- Use fade-resistant outdoor paints and markers
Storage Solutions
Proper storage ensures your decorations last for years:
Immediate Post-Holiday:
- Clean all pieces with damp cloth before storing
- Allow everything to dry completely (prevents mold)
- Remove batteries from any lighted elements
- Take photos of displays for easy recreation next year
Organization System:
- Large plastic bins with lids (protect from moisture and pests)
- Label each bin: “Candyland – Lollipops,” “Candyland – Candy Canes,” etc.
- Store pool noodle items vertically to prevent denting
- Wrap delicate painted pieces in tissue paper
- Keep all hardware, stakes, and accessories in labeled ziplock bags
Storage Location:
- Climate-controlled spaces ideal (basement, closet)
- Avoid extreme temperatures that could warp plastic components
- Keep away from direct sunlight during storage
- Elevate bins off concrete floors
- Stack lighter bins on top of heavier ones
Repair Kit Essentials
Keep these items handy for quick fixes:
- Extra hot glue sticks
- Matching paint pens
- Clear tape and duct tape
- Extra cellophane wrap
- Rubber bands in various colors
- Wire cutters and extra floral wire
- Touch-up spray paint in key colors
Mid-Season Maintenance Checklist:
- Week 1: Initial inspection after installation
- Week 2: Check all stakes and stability
- Week 3: Touch up any faded paint
- Week 4: Tighten loose elements
- Weekly: Quick visual check after storms
Multi-Year Durability
With proper care, these decorations easily last 3-5+ years:
Year 1: Everything looks fresh and vibrant
Year 2: Minor touch-ups may be needed on painted areas
Year 3: Replace cellophane on wrapped items, refresh some paint
Year 4-5: Some components may need rebuilding, but most remain sturdy
Replacement Timeline:
- Cellophane wrap: Replace every 2-3 years
- Paint details: Touch up annually
- Pool noodles: Last 4-5 years with proper storage
- Plastic plates: Virtually indestructible
- Hot glue bonds: Permanent when done correctly
Candyland Color Schemes (Pastel vs Traditional)
Choosing your color palette sets the entire tone for your candy land theme. Here’s a deep dive into both popular options for 2025.
Pastel Candy Christmas (2025 Trend)
The pastel candy trend dominates social media and design magazines this year. This softer approach creates an elegant, dreamy holiday atmosphere.
Color Palette:
- Blush pink (#FFB6C1)
- Mint green (#98FF98)
- Baby blue (#89CFF0)
- Lavender (#E6E6FA)
- Cream/ivory (#FFFDD0)
- Soft gold accents
Best For:
- Modern, contemporary homes
- Instagram-worthy photos
- Adult-focused displays
- Complementing neutral home décor
- Creating sophisticated candy themed spaces
Sourcing Pastel Supplies:
- Dollar Tree carries pastel plastic bowls and plates seasonally
- Mix white items with sheer colored cellophane for pastel effects
- Light application of pastel spray paint over white bases
- Dilute acrylic paints with white for softer hues
Pastel Combination Ideas:
- Mint Chocolate: Mint green + cream + soft brown
- Strawberry Dream: Blush pink + cream + hint of rose gold
- Cotton Candy: Pink + blue + white
- Sherbet Swirl: Orange sherbet + pink + yellow + cream
Traditional Bright Candyland
Classic, bold bright colors never go out of style and create that nostalgic candy land game feeling.
Color Palette:
- Cherry red (#E32636)
- Emerald green (#50C878)
- Bright yellow (#FFFF00)
- Royal blue (#4169E1)
- White (#FFFFFF)
Best For:
- Family-friendly displays
- Nostalgic, traditional Christmas lovers
- High-visibility outdoor displays
- Complementing classic red/green Christmas décor
- Creating cheerful, energetic spaces

I’m Watson, a faith-inspired writer passionate about sharing heartfelt blessings and uplifting words that bring peace, gratitude, and hope. Through my daily blessings, I aim to comfort the soul and inspire spiritual growth.